Please find the source data for our eLife reviewed preprint titled:
Cestode larvae excite host neuronal circuits via glutamatergic signaling
below
Please find the source data for our eLife reviewed preprint titled:
Cestode larvae excite host neuronal circuits via glutamatergic signaling
below
Please find below the experimental data for our 2020 paper in PLOS Neglected Tropical Diseases titled: Taenia larvae possess distinct acetylcholinesterase profiles with implications for host cholinergic signalling
shared using a publicly accessible dropbox folder.
https://www.dropbox.com/sh/83scv79mom1ug21/AACh08I5c-fBIHLaaoeydLXRa?dl=0
Please find below the experimental data for our 2020 paper in PLOS Computational Biology titled: Chloride dynamics alter the input-output properties of neurons
shared using a publicly accessible dropbox folder.
https://www.dropbox.com/sh/1vprdumypkwjb1r/AACkMArWwN2XnVkajtAXroiDa?dl=0
Please find below all the data for our 2019 paper in Brain titled: Excitatory GABAergic signalling is associated with benzodiazepine resistance in status epilepticus
shared using a publicly accessible dropbox folder.
https://www.dropbox.com/sh/xrxy9k90t7jmtuy/AACxwHKghMLzAPldjIXJI7bza?dl=0
We are proud to announce that our paper describing the construction and performance of an open hardware ‘Picospritzer’ – Openspritzer is out. This was a collaborative effort with the Baden Lab who have a strong interest in open hardware and the development of neuroscience research capacity in Africa. Please find the paper and detailed build instructions here.
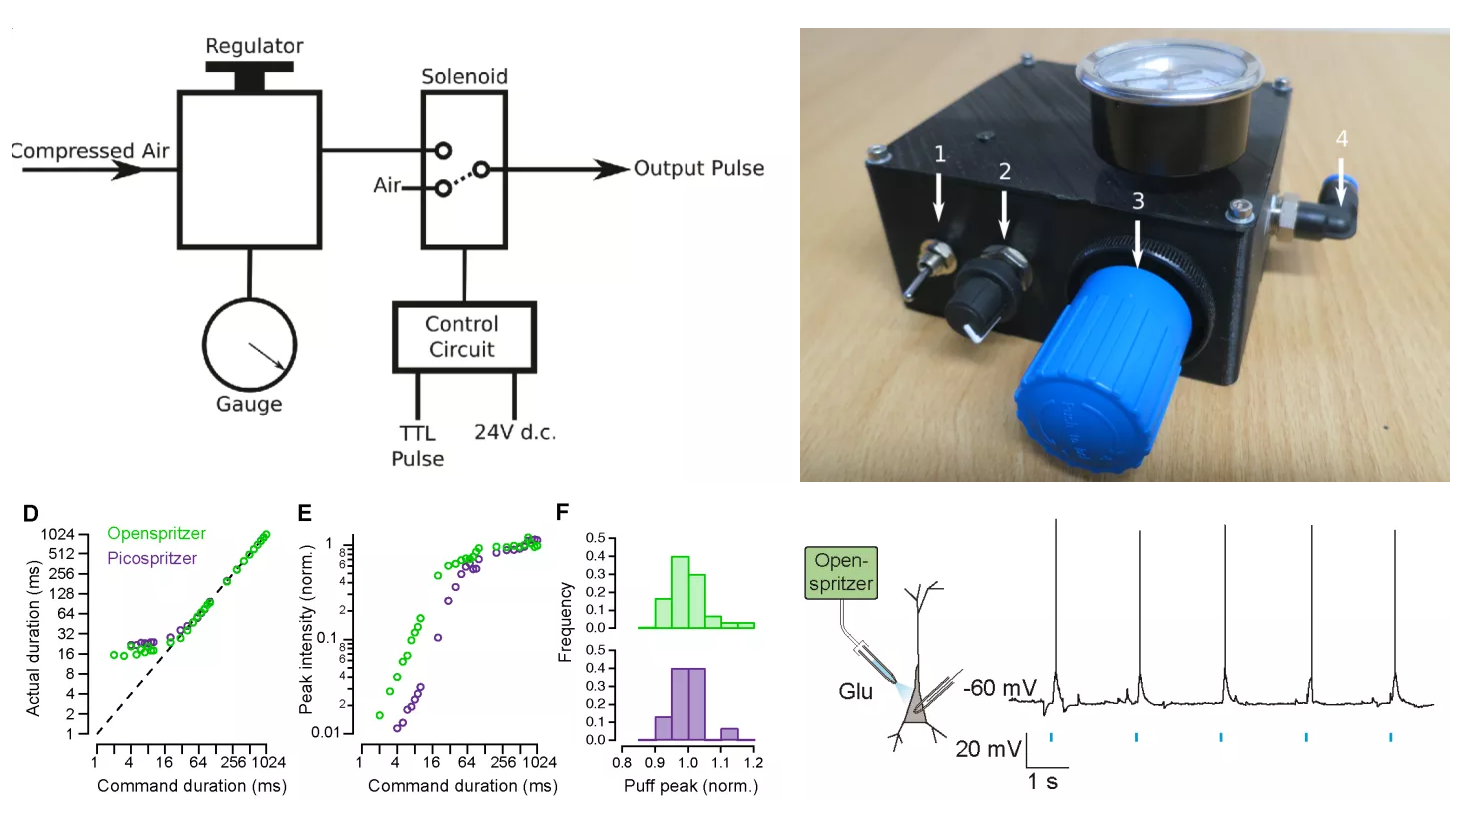
Designed for ease of use, robustness and low-cost, the “Openspritzer” is an open hardware “Picospritzer” as routinely used in biological labs around the world. The performance of Openspritzer and commercial alternatives is effectively indistinguishable.
The system is based on a solenoid valve connected to a pressure gauge. Control can be attained directly via an external TTL pulse or internally through an Arduino set by a rotary encoder. The basic setup can be put together for 3-400€, or substantially less if you are prepare to shop around.
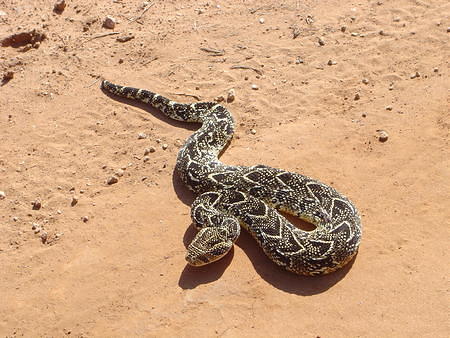
Many laboratories require a means to deliver picolitre or nanolitre volumes. We use a picospritzer for delivering small puffs of GABA or other neurotransmitters to activate receptors on single neurons within brain slices. Commercial Picospritzers can cost roughly $3000 or in South African terms about R30 000. Inspired by a post describing a custom built Picospritzer on Labrigger, we built our very own custom made DIY picospritzer for about R4000. It’s African and decidedly less dangerous than the local snake it’s named after: the Puff Adder.
The key component is a Solenoid 3/2 way valve built by Festo, which can open or close in about 2 ms. I’ve listed all the parts below with photos of how it was all put together. It is controlled by a TTL (5V) signal from a computer, with reliable timing and the ability to produce short puffs down to about 10 ms in duration. I hope you find this description useful.
Solenoid Valve, Pressure Regulator, Tubing and connectors:
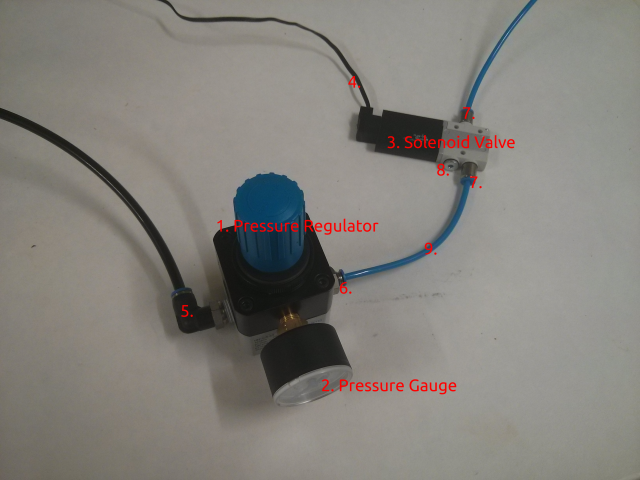
1- Festo Precision Pressure Regulator LRP-1/4-4 (from 0.05 to 4 bar / 0.7 to 58 psi pressure range) Part No: 159501
2- Festo Precision Gauge MAP-40-4-1/8-EN (from 0 to 4 bar / 0.7 to 58 psi pressure range) Part No: 162842
3- Solenoid Valve MHE2-M1H-3/2G-M7 (3/2 way valve) Part No: 196130
4- KMYZ-4-24-2.5-B (plug in cable for valve – not essential) Part No: 193691
5- QSL-1/4-6 Festo Push-in/threaded L-fitting (L fitting to take input from pressure line to regulator port 1, takes 6 mm tube) Part No: 153047
6- QS-1/4-4 Festo Push-in fitting (to screw into port 2 of regulator) Part No: 190644
7- 2x QSM-M7-4-I Festo Push-in fitting (to screw into ports 1 and 2 of the solenoid valve) Part No: 153319
8- B-M7 Festo Blanking plug (blanking plug to block port 3 of valve / ie block exhaust port if required) Part No: 174309 – Update I discovered it is better not to utilise a blanking plug here – ie the pressure is delivered only for the duration of the puff and is released via the exhaust valve straight after
9- 1m of 4mm OD Festo Plastic tubing Part No: 159662
Electronic Components
The Festo solenoid valve needs a 24V signal to open. Most computer controlled digiboards generate a 5V signal (TTL) to control components. As such we needed to build a small circuit which converts a 5V signal from the computer/ digiboard to a 24V signal in order to control the valve. This is done by using the 5V TTL signal to open or close the gate of a standard NPN transistor. We used a bit of strip board and the components listed below to build the circuit. It was then shoved in a black plastic box to make it look official!
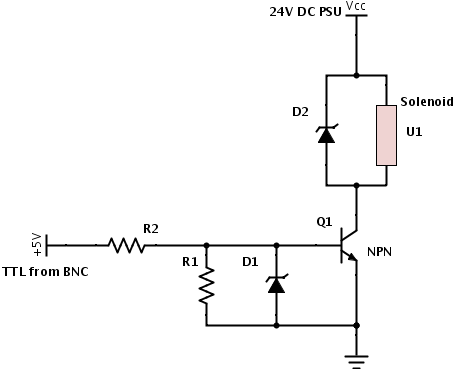
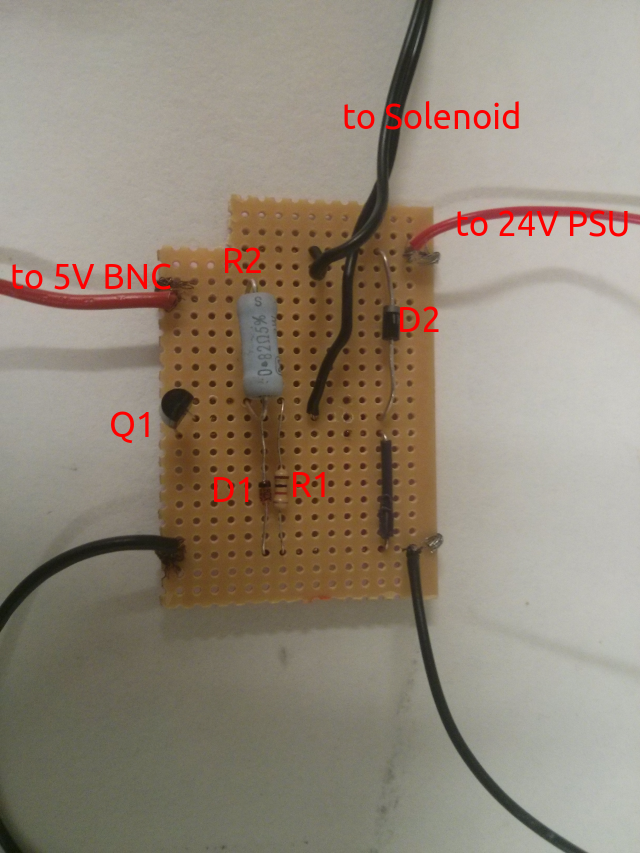
Q1- Bipolar Transistor – BJT NPN Gen Purpose (Mouser Part No: 610-2N5088)
D1- Zener Diode 5V
D2- Zener Diode 24V
R1- 1K ohm resistor
R2- 0.82 ohm 3W resistor (could use a normal higher resistance resistor) (Mouser Part No: 667-ERX-3SJR82A)
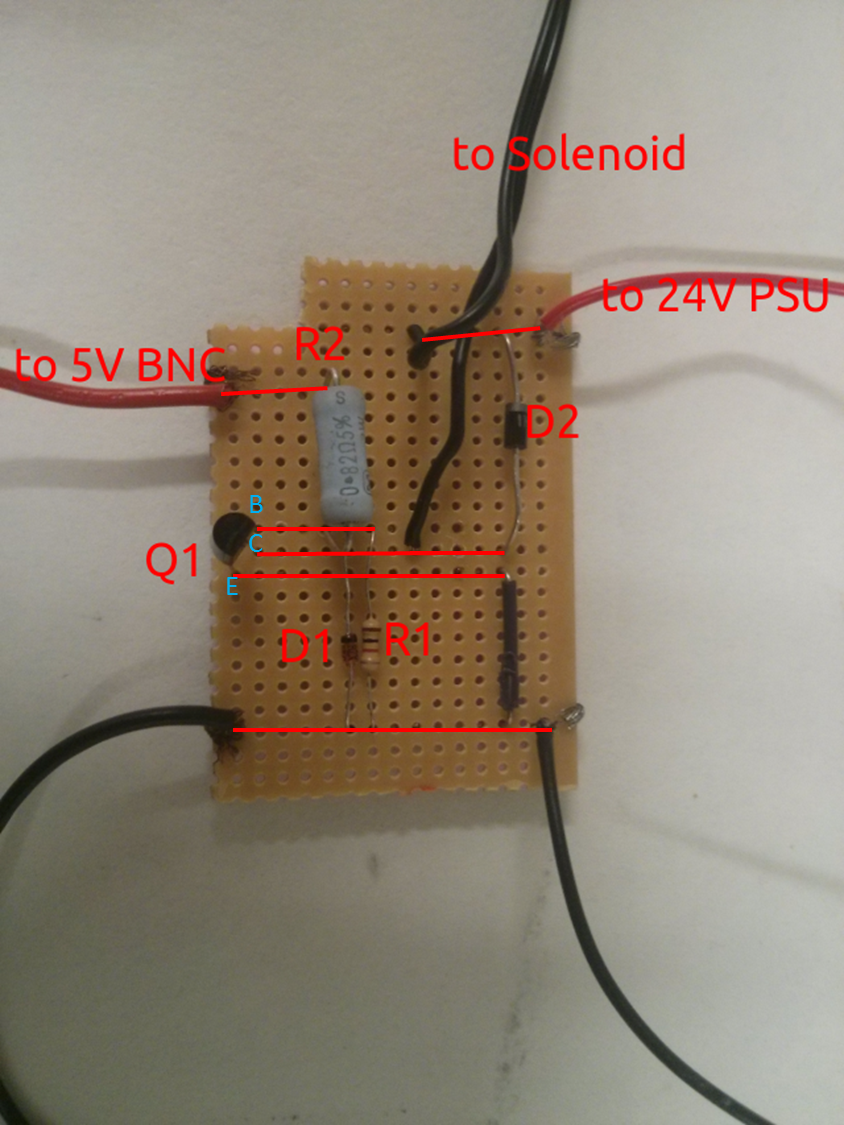
The red lines here indicate the circuit connections via the back.
Power supply and other miscellaneous electronic items
– 24V DC power supply unit, 1.04A (Mantech Part No: 30C0007)
– DC power jack socket panel mount 2.1mm (Mantech Part No: 14C2716)
– BNC male connector socket (Communica Part No: 51K506-200A4)
– Black plastic box (Communica Part No: BTA1B)
– Strip board 100x300mm (Communica Part No: EXCU21-300)
– Wiring and a soldering iron to put it all together
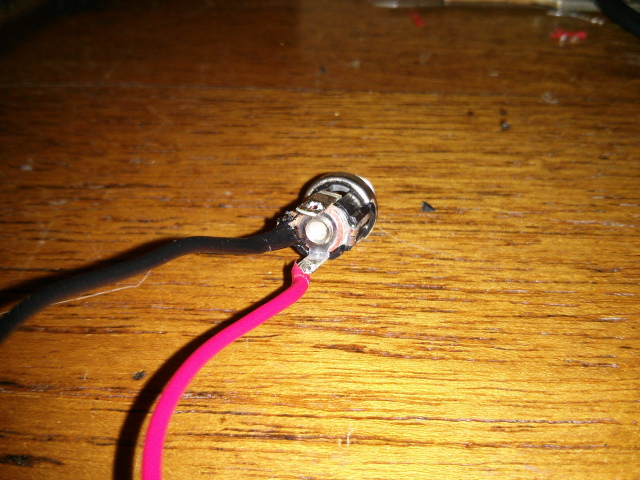
We struggled to wire up the DC socket – the photo above shows what worked in the end.
After soldering the circuit board and and wiring it all up it got placed in a smart looking black plastic box.
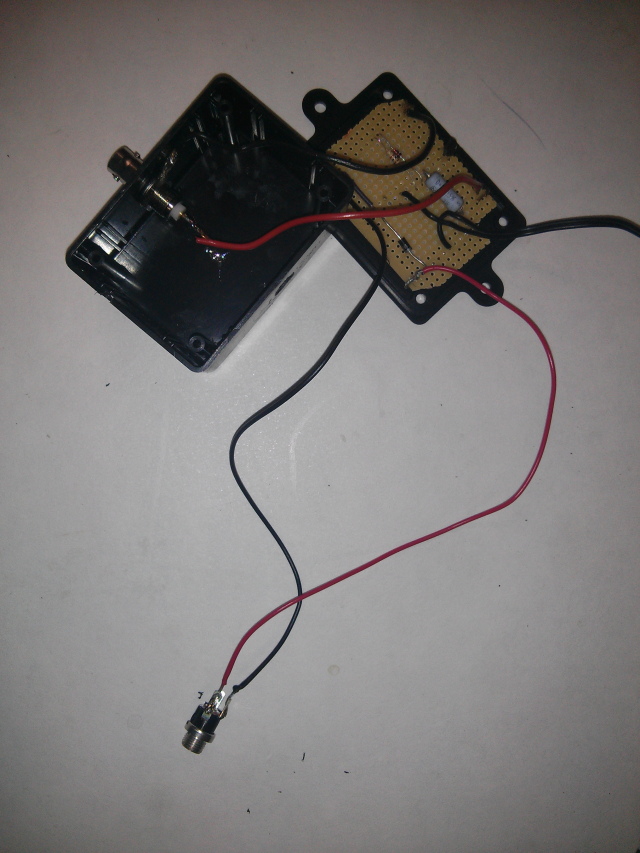
And voila! We hope your PuffAdder gives you hours of puffing joy!